Yoga for Core Strength & Exercises to Strengthen Your Diaphragm, Transverse Abdominis, Rectus Abdominis, & Obliques
We’ll also work on strengthening your core, which helps to support proper diaphragmatic breathing. Finally, we’ll put all of that into practice, so you can breathe properly, utilizing your entire diaphragm, as you practice essential balancing exercises.
This blog includes:
- What is diaphragmatic breathing?
- The Best Exercise to Strengthen Your Diaphragm
- Exercises to Strengthen Your Abdominals?
- (Transverse Abdominis, Rectus Abdominis, Internal & External Obliques)
- Yoga for Diaphragmatic Breathing
- (integrating diaphragmatic breathing, core strength, and hip strength into yoga postures in a 37-minute FREE yoga workout)
What is diaphragmatic breathing?
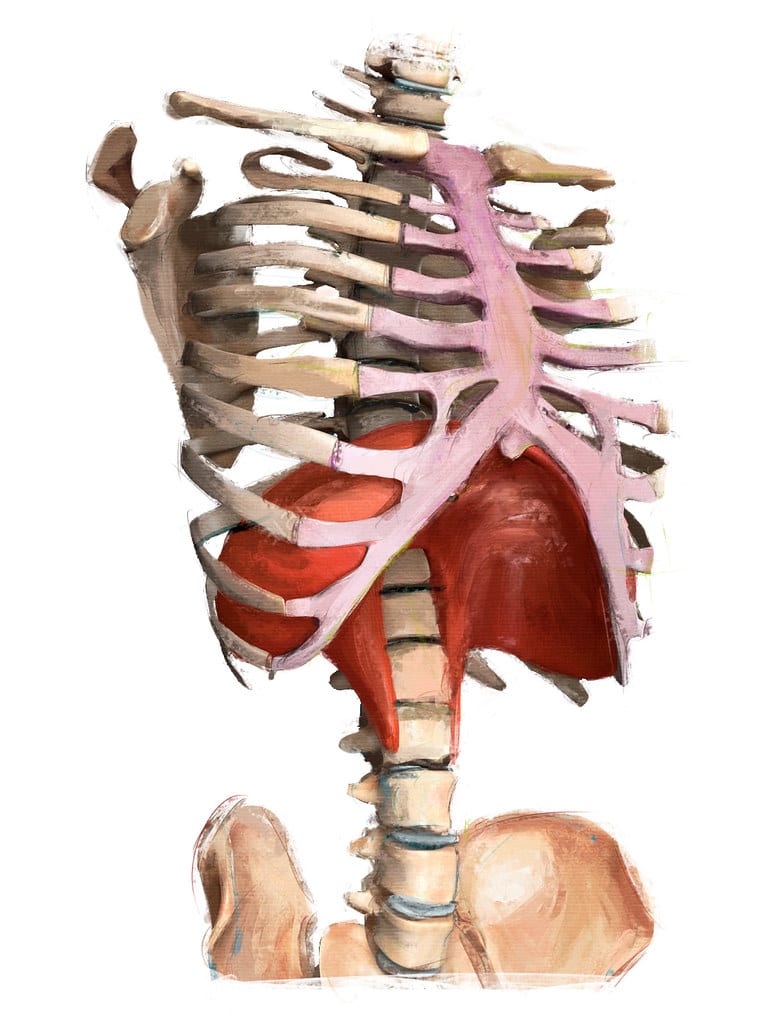 Diaphragm
Photo by Interactive Content is licensed under CC BY‑NC‑SA 4.0
But diaphragmatic breathing involves more than just the diaphragm. It works in conjunction with the abdominal muscles (transverse abdominis, rectus abdominis, and obliques) and your intercostals to help you breathe. These abdominal muscles make up what’s referred to as your “core”.
 Ab Muscles
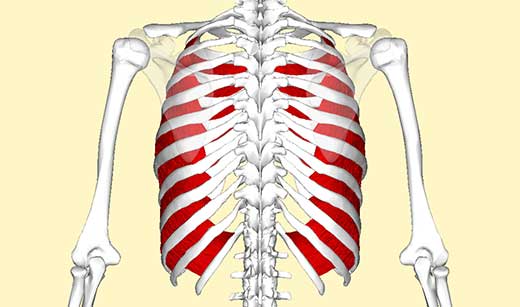 Intercostal Muscles
Photo by BodyParts3D is licensed under CC BY‑SA 2.1 JP
Each of these areas – the diaphragm, the core, and your intercostals – require the appropriate exercises to build strength and increase their overall efficiency. And when it comes to breathing, it’s just like any other exercise – you need all of the required muscles to do their job.
Just as a squat requires the proper involvement of the ankles, knees, hip muscles, and core, diaphragmatic breathing requires the proper muscular involvement of the diaphragm, the core, and your intercostals.
This is why it’s important that you strengthen all of these areas in order to have proper diaphragmatic breathing. In the sections below, I’ll show you how to do exactly that.
The Best Exercise to Strengthen Your Diaphragm
The best exercise for strengthening your diaphragm is a very simple one, but it may take some practice if you’ve never done it before. If you tend to be a very stressed, high-strung person, have poor posture, or have never worked on your breathing before, I’d recommend being patient with yourself.
The good news is that we’re going to start working on your diaphragm strength in a very simple position. You can do this lying on your back on the floor, and you can even utilize cushions or other props to help make yourself more comfortable. This exercise focuses on inhaling and exhaling with as much “range” as possible, from your pubis (your pubic bone, located below your waist and just above your genitals) all the way up to your ribs. Keep your legs, shoulders, and back inactive – you want to make sure you are isolating your breathing.
Watch the video below and read the instructions to learn the in-depth, proper technique for diaphragmatic breathing.
Instructions:
- Lie down on your back in a comfortable position. Use cushions or props to support your head, or place a pillow under your knees if desired.
- Place one hand on your upper chest (right around your heart), and place the other hand just below your rib cage. (This allows you to feel your diaphragm move as you breathe in and out.)
- Inhale through your nose- as you do so, focus on slowly expanding the entire lower ⅔ of your torso, starting at the pubic bone, and going all the way up to your rib cage. Avoid lifting your chest off the ground or arching your back. Note: The expansion of your belly area should come from breathing, and not from you moving your body. Your top hand will move if you cheat and arch your back.
- Exhale softly through the mouth – squeeze your abdominal muscles as you “deflate” your stomach. Think of pulling your belly button to your spine as you do this. Avoid rounding your chest or allowing your chest to cave in. Note: As you near the end of your exhale, continue to squeeze the air out, even when you think you’ve reached your limit.
- Do at LEAST 10 breaths to the best of your ability. If it takes you a longer time to settle into a rhythm and get high quality breath repetitions, I recommend going up to 20 or even 30 breaths. Expect to spend at least 2 minutes, and up to 5 minutes doing these.
How long should each inhale and exhale take?
Everybody is different, and depending on your stress level, your bodyweight, and your physical fitness, your breaths will be shorter or longer than the average person. My recommendation is to start at 4 second inhales, and match those with 4 second exhales. From there, you can increase the time. You should aim to get your inhales and exhales up to 6, 8, or even 10 seconds each. If you practice this often, and have a high level of physical fitness, it’s not uncommon for a full breathing cycle (the inhale and the exhale) to last for a total of 30 seconds.
Things to Keep in Mind:
- Through practice, you’ll notice that you can inhale and exhale to a much greater degree than you thought possible. This is because most of us don’t breathe with full diaphragmatic breathing on a regular basis, so it feels much different when we actually use our full breathing capacity.
- Tip: Think of filling yourself up with as much air as possible, and then squeezing out all the air you possibly can.
- If you push yourself, you’ll notice that your breathing will be significantly longer than normal breaths.
- As you practice diaphragmatic breathing, you may feel muscle tightness, muscle “burn” or fatigue in your abdominal muscles, diaphragm, or intercostals, as your body might not be used to this level of breathing.
- If you tend to be more of a “shallow” breather, you’ll notice more activity in your lower torso.
- If you tend to be more of a “belly” breather, you might notice more stretching in your ribs when utilizing full diaphragmatic breathing.
Now that you’ve got the technique down for diaphragmatic breathing, you’ll want to do exercises that help to strengthen the supporting muscles in your core and hips, including your transverse abdominis, rectus abdominis, internal & external obliques, hip flexors, hip adductors, and hip abductors.
Looking for A Program?
If you enjoyed that and want more workout routines, then Man Flow Yoga has you covered with on-demand structured programs that complement your lifestyle and schedule. Sign-up below to try our 7-Day Challenge!
Signup for the FREE 7-Day Challenge
Exercises to Strengthen Your Abdominals
Transverse Abdominis, Rectus Abdominis, Internal & External Obliques
In this section, I’ll show you some of the best exercises to strengthen your abdominals. Specifically, we’re going to be doing a lot of work with your transverse abdominis, which is often neglected in traditional workouts.
What makes up your abs?
Your abs [abdominal muscles] are made up of more than just your “six-pack” muscles. (And even if you can’t see them, it doesn’t mean they’re not there!) It also includes your transverse abdominis and your internal and external obliques.
You might also hear the phrase “core” strength thrown around in conjunction with ab strength. Your core is basically the entire mid section of your body, starting at your upper thighs and working its way all the way up to your ribs. This is why your hips are extremely important to overall core strength, and you’ll notice lots of activity in your hip flexors in the exercises below.
The best exercises for building abdominal strength (in my opinion) are the simple ones, and these can be done lying down on your back with zero equipment. Ready to learn? Let’s go!
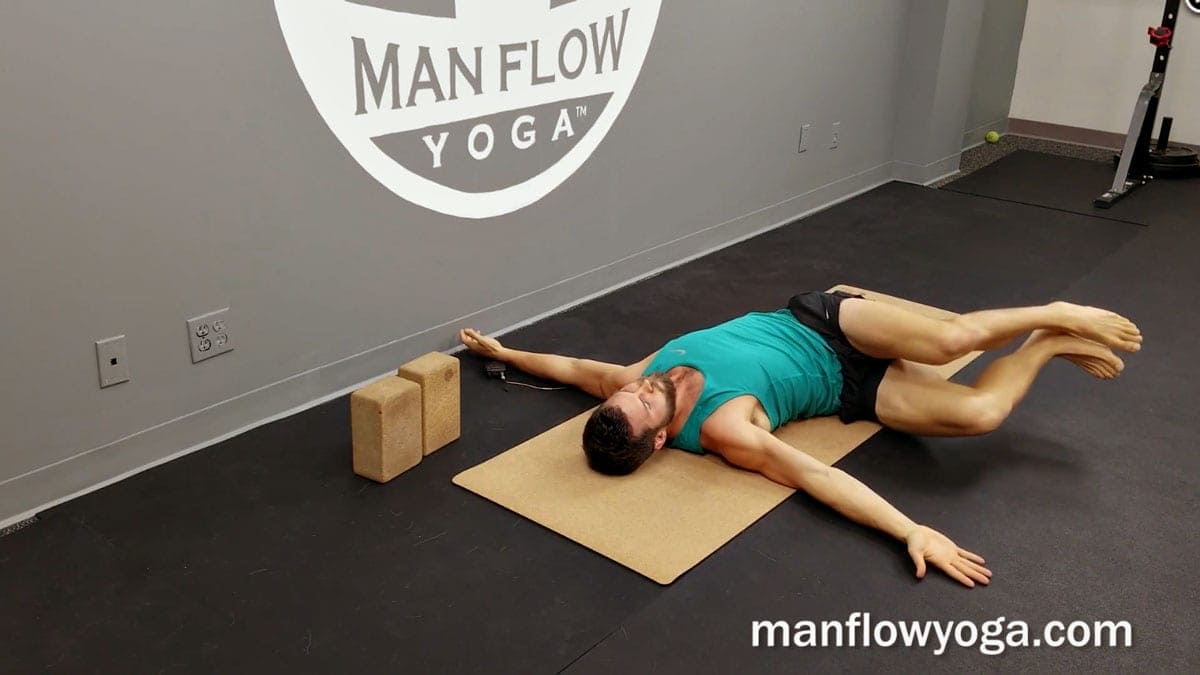
Ab Exercise 1: Hands-To-Thighs
This is a great exercise for developing core strength and core awareness. It helps you understand the feeling of using your transverse abdominis muscles and hip flexors in particular.
Target Area: Transverse Abdominis, Rectus Abdominis, & Hip Flexors
Technique:
- Start lying on your back, with your chin lightly tucked in toward your throat, and spine neutral.
- Position your knees directly above your hips, forming a ninety degree bend in both your knees and your hips.
- Press your hands into the corresponding thighs, and press your thighs back into your hands. As you do this, you should feel tension in your hip flexors (the top fronts of your thighs) and your transverse abdominals (the deep layer of your abdominal muscle wall). To add engagement to your rectus abdominis, you can lift your shoulders off the ground. (But keep your neck relaxed!)
- To make this more challenging, push hands and thighs into one another more intensely. You should feel shaking and maybe muscle cramping in your core as you do this.
- Hold this for at least 30 seconds, and up to 60 seconds. Remember to BREATHE slow and in control.
Tips:
- If you’re new to this, you might find yourself holding your breath. Remind yourself to breathe as slow and controlled as possible.
- Avoid craning your neck off the ground. We want this exercise to focus on your core, and not on your neck.
Why it’s important:
- Helps you practice proper diaphragmatic breathing while building core strength.
- Build strength in the core muscles that support your diaphragm in diaphragmatic breathing.
Ab Exercise 2: Single-Leg Reverse Crunch with Hands-To-Thigh

Very similar to the hands to thighs exercise, this instead focuses on pressing both hands into a single thigh. There is more hip flexor activation here.
Target Area: Transverse Abdominis, Rectus Abdominis & Hip Flexors
Technique:
- Start lying on your back, chin tucked into your throat, and spine neutral.
- Bring your [right] knee directly above your [right] hip, and extend (straigthen) your [left] leg straight out, hovering about 1-2 feet off the ground. (Depending on how your back feels here, you might want to have the extended leg higher up, or closer to the ground for more of a challenge.)
- Press both hands into your [right] thigh, and press your [right] thigh back into your hands. To make this more intense, press your hands and thigher harder into one another.
- Switch sides and repeat.
- Hold for at least 30 seconds, and up to 1 minute. You can also alternate from side to side, holding each “rep” for 1 full breath cycle, or about 4-8 seconds.
Tips:
- Lift your shoulders off the ground and twist lightly TOWARD the bend leg for greater core activation in your rectus abdominis, as well as your obliques. If you do this, remember to keep your neck relaxed. You want to lift your shoulders, not your neck.
- This is fairly intense for the hip flexor. When you feel the muscles start to fatigue, keep going! This is how you get stronger.
Why it’s important:
- In the context of diaphragmatic breathing, this exercise helps you develop strength in the abdominal muscles responsible for inhaling and exhaling.
- The muscles worked here are responsible for all lower-body movements, whether it’s yoga, weight lifting, or even running.
- Having strength in your core and your hips is important for preventing lower-back pain.
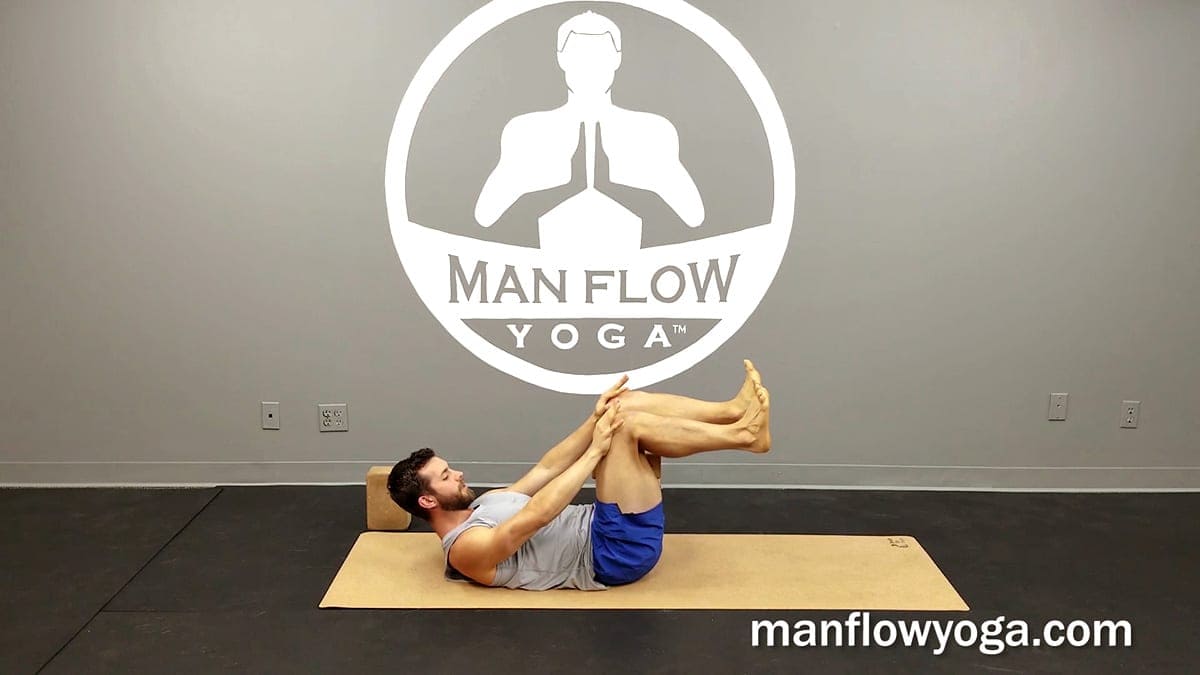
Ab Exercise 3: Reclined Twists
An effective exercise that helps to build strength in your obliques, creates space in the lower vertebra (lumbar spine) of your lower-back, and relieves back pain associated with inactivity or tightness.

Target Area: Internal & External Obliques
Technique:
- Start on your back, with your knees directly above your hips.
- Inhale, and keeping your shoulders on the ground, bring your stacked legs as far as you can toward the ground, hovering just off the ground if possible.
- Exhale to squeeze your abdominal area, using your core strength to bring your knees back above your hips. Avoid using your upper body to “press” your legs back into the starting position.
- Switch sides and repeat 5-10x.
Tips:
- Try to move relatively slow and controlled through this exercise, but recognize that your inhales (and the corresponding movement of bringing your legs to the outside) will be
- longer than your exhales (and the corresponding movement of bringing your knees back above your hips).
- It’s okay if your shoulders may come off the ground (this usually happens when you’re tight in your spine and shoulders), but try to keep your shoulders down. You want to avoid using your upper-body here, and focus on using your core strength to bring your knees back to the middle.
FREE Yoga Workout: Diaphragmatic Breathing, Core Strength, Hip Strength & Balance
Ready to put it all together? Here’s a 37-minute workout that integrates all of the topics we’ve just covered – diaphragmatic breathing, abdominal strength (transverse abdominis, rectus abdominis, and external & internal obliques), and hip strength – into a beginner-friendly FREE yoga workout.
This workout is as challenging as you want it to be. Push yourself when you can, and don’t be afraid to take it easy as well. This workout is from the Strength Foundations Course, one of the most popular programs in the MFY Members’ Area, and probably our most transformative program. Give it a shot!! (Be sure to subscribe to my YouTube channel if you haven’t already!)

Summary: Benefits of Diaphragmatic Breathing
Diaphragmatic breathing is the most efficient way for you to breathe. It helps your fitness on so many levels, physically by allowing you to develop strength in your lungs and your abdominal area, but also on a mental and hormonal level by relieving stress, activating the parasympathetic nervous system, and helping you maintain your focus throughout the day.
The more you practice diaphragmatic breathing, the more automatic it will become. I recommend working on this whenever you practice yoga, as well as throughout the day. If you notice that you are breathing shallowly or are feeling stressed, give yourself 2 minutes to dedicate 100% of your focus on diaphragmatic breathing. You’ll be surprised at what this can do for you!
Lastly, I want to ask you a question, and I’d love to see you response in the comments section below: How’s your breathing on a day to day basis? Do you notice that you have shallow breathing, or often feel constricted and stressed? Have you practiced diaphragmatic breathing before? Leave your response in the comments section below.
Additional Resources
You might be interested in relieving neck and shoulder pain, strengthening your glutes, or learning how to decompress your spine, so check out these 3 blogs!
About the author, Dean Pohlman, Founder & CEO of Man Flow Yoga, Author of Yoga Fitness for Men, Expert on Yoga Fitness for Men.

Looking for non-spiritual, yoga for men workouts?
Learn More About Man Flow Yoga and how it can help you with your fitness goals:
 Join Today for Instant Access!

Thanks for the great video Dean! I’ve been practicing the Wim Hof breathing method for a few months. It’s quite the sensation in body, electrifying.
How does this Diaphragmatic breathing differ from the Wim Hof method?
Also, what do you think of holding the breathe at the end of the practice? I’ve been experimenting with this (sort of like free divers would do) and would be curious to hear your thoughts.
Thanks for creating great content!!
Hey Brad – heard some amazing things about the Wim Hof method, although I have not practiced in myself and I don’t know specifics. For this reason, I can’t really give you an opinion on how diaphragmatic breathing differs from Wim Hof. I think Wim Hof is faster though.
You can hold your breath at the end of your yoga practice if you’d like. I don’t see why it would hurt!
This a what we do as singers. By not letting the chest raise of lower in the breathing, one must keep the outer intercoastal muscles engaged. That is pretty easy on your back, but a much different question while standing. It is a matter of constant work. As a singer, we work to never let our ribs down from before the first breath to the cut off of the last note of a song. Yes indeed, we singers are athletes!!
Thank you for the feedback Bob! Your insight and perspective is appreciated.
Singing is a sport I’ve never excelled at 🙂