If you are looking for a yoga solution to help you safely build strength—especially if you’re concerned that traditional gym workouts or heavy resistance training might hurt your joints—this routine is for you.
We’re focusing on a joint-friendly, low-impact workout that helps you build muscle and fight sarcopenia with a much lower risk of injury. It also works as a great foundation: doing these movements will help you be far more effective and pain-free when you do other resistance training exercises like squats or lunges.

The Joint Friendly Way to Build Strength
Today, we are focusing on two main areas: your core and your thighs. These are the spots where most adults first start noticing muscle loss as they age. You don’t need any special equipment for this routine, though having a couple of yoga blocks, a chair, or a wall nearby can be really helpful for balance and support.
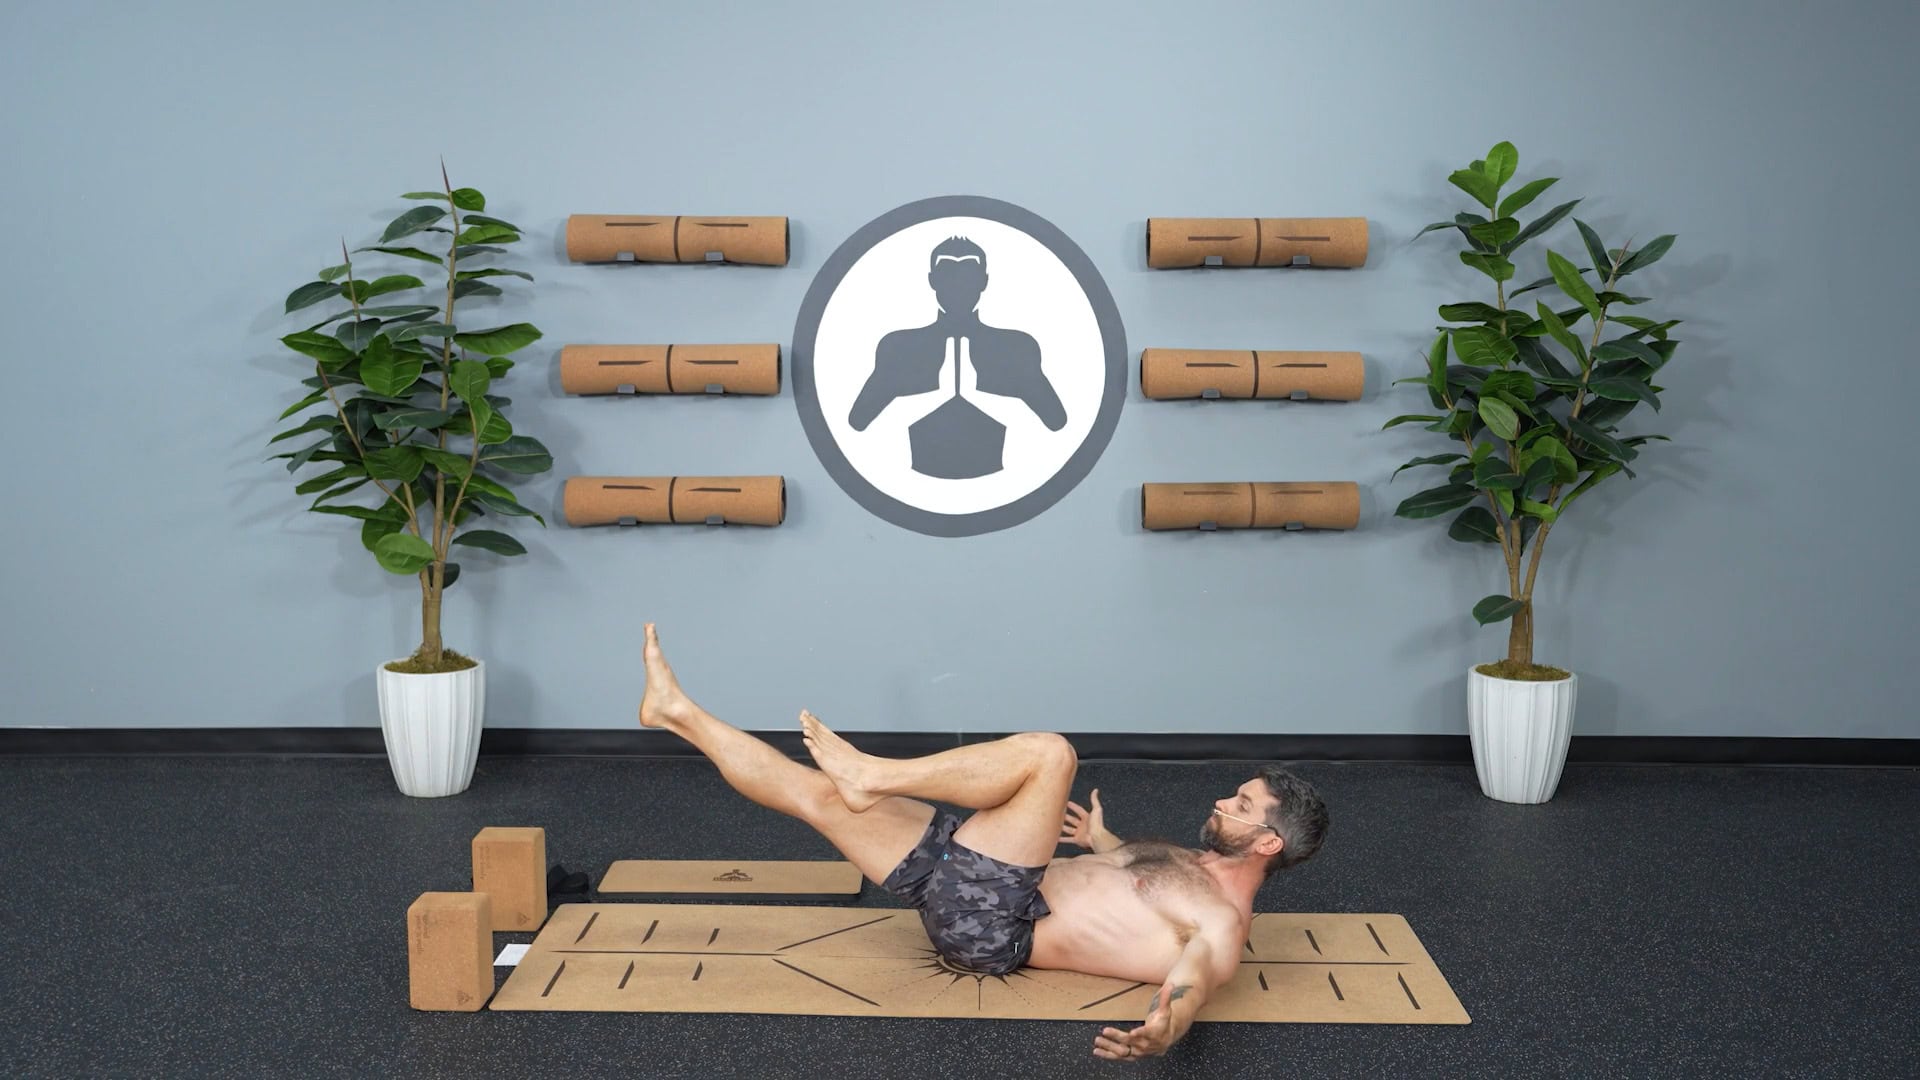
Step 1: Core Stability on Your Back
We start on the mat to work on core stability. Building deep core strength is the number one way to prevent lower back pain during everyday movement and exercise.
- Lie flat on your back and bring both knees directly over your hips.
- Press your lower back firmly into the ground. As you do that, you should feel your abs engage and start to burn a little—that’s exactly what we want.
- Extend your left leg forward. If you are newer or still building strength, keep that leg higher up toward the ceiling. If you’re stronger, bring it closer to the ground. Just ensure your lower back never leaves the floor. You can hold onto your right knee with your hands to make it easier.
- Hold for 5 to 10 seconds, then switch sides.
Instead of rushing back and forth, move slowly. We are building isometric control so you have the trunk stability to handle standing strength work later on.
Step 2: Glute Bridge
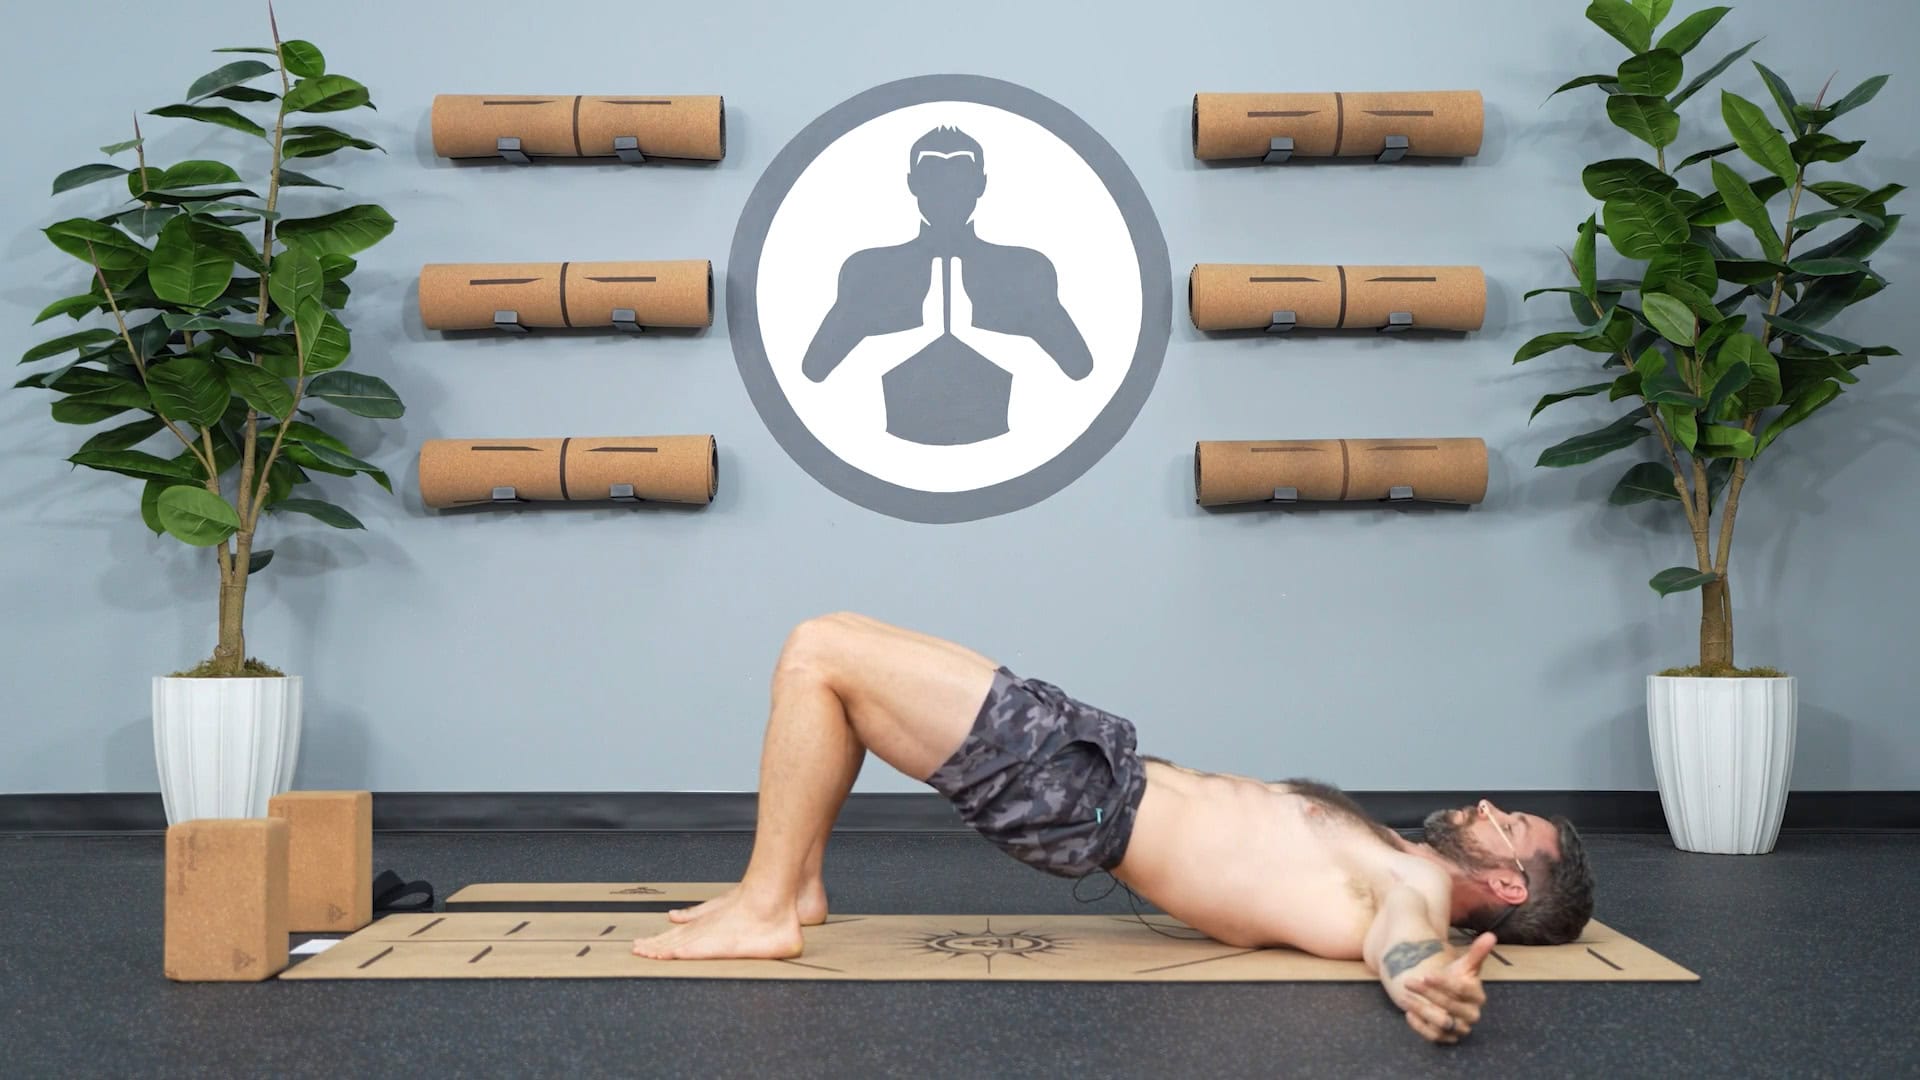
Next, we target the glutes and quadriceps. Your quads are among the most common muscles impacted by sarcopenia, so waking them up is essential.
- Plant your feet flat on the floor, about six inches away from your hips.
- Drive your feet firmly into the ground to lift your hips into the air.
- Don’t lift from your lower back—use the power of your feet and legs to drive upward.
- Squeeze your glutes and hold. If you only lift a few inches off the floor, that is completely fine.
This is an isometric exercise: holding the position builds foundational strength and muscle awareness before adding repetitive reps. If you get tired, lower down, take a breath, and press back up.
Step 3: Standing March Hold
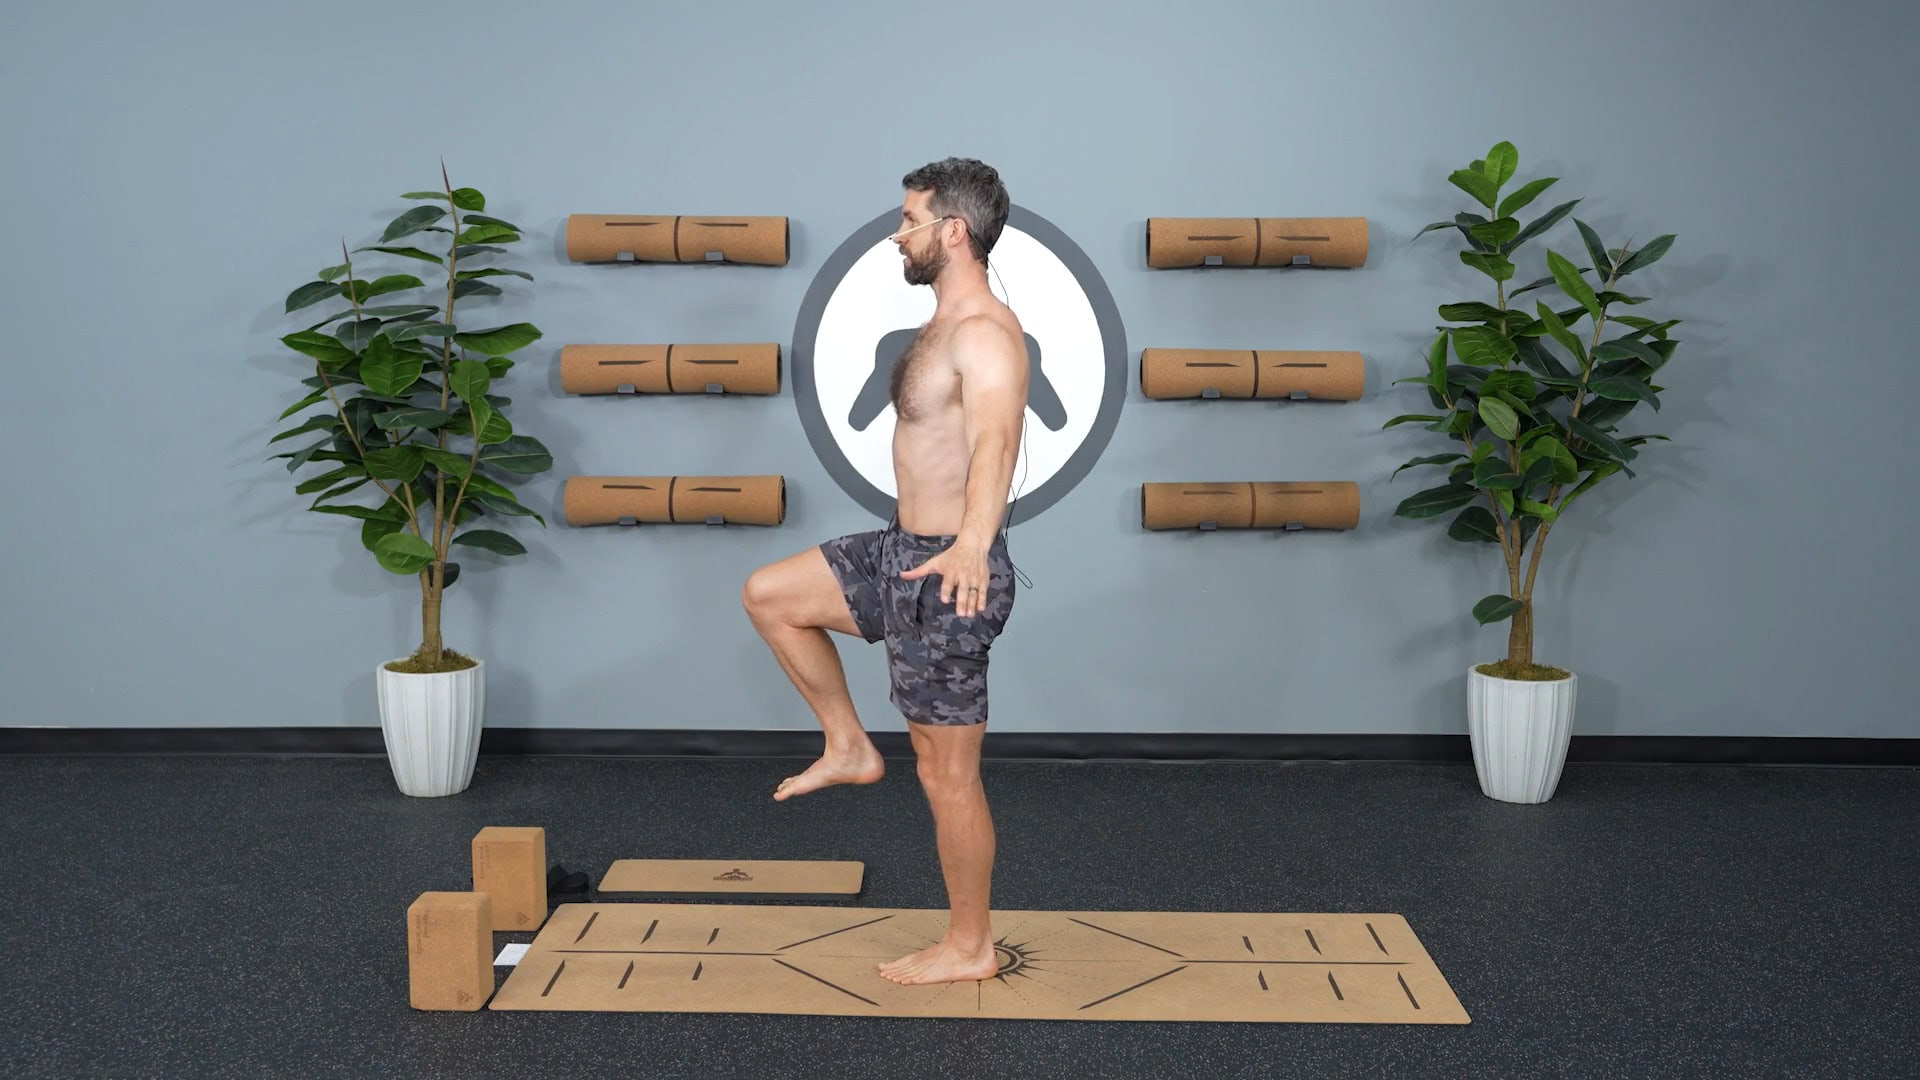
Balance is part skill and part strength. Standing balance challenges your ankles, feet, and stabilizer muscles throughout the legs.
- Stand tall near a wall, chair, or counter. Place your hand on that surface for support—I always recommend using support to keep proper technique rather than struggling with bad form.
- Root down through your standing foot, gripping the ground with all five toes and pressing into your heel.
- Hover your opposite foot off the floor. Keep it low like a kickstand if you feel unsteady, or lift the knee higher to challenge the thigh.
- Find a non-moving point at eye level to steady your gaze.
- Hold for several breaths, then switch legs.
Some days your balance will be great, and some days it won’t. Don’t get discouraged—simply practicing the hold builds lower-body strength.
Step 4: Supported Lunges
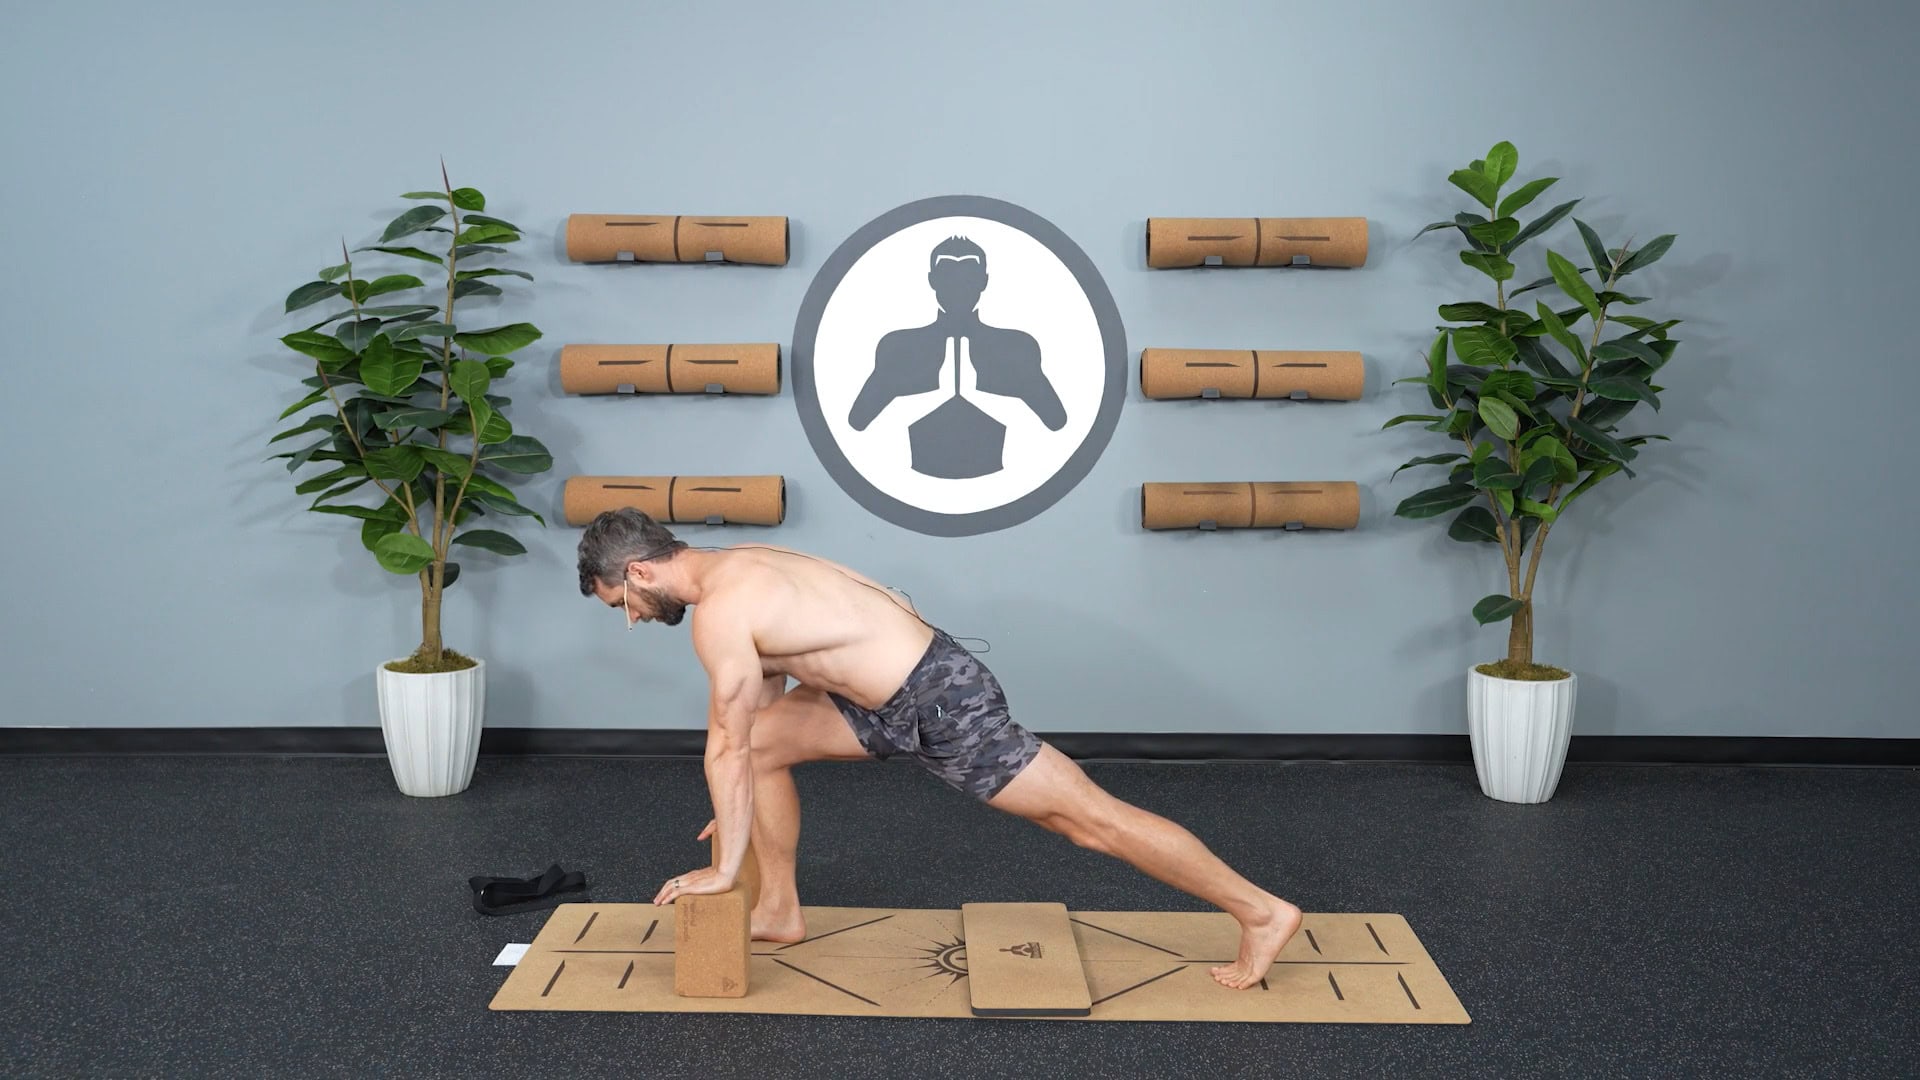
Lunges build strength in the ankles, knees, and hips, but they can be tough on sensitive joints if unsupported. Use a folded towel or knee pad under your back knee if you need cushioning.
- Step your right foot forward and your left leg back into a low lunge with the back knee down.
- Tuck your back toes if possible to engage the back leg.
- Actively press down through your front foot as if you’re trying to push yourself off the ground. Even without moving, that downward pressure turns this from a passive stretch into an active, muscle-building isometric hold.
- If you want more challenge, place your hands on blocks or the seat of a chair, tuck the back toes, and lift the back knee off the floor into a supported runner’s lunge.
- Hold for 10 to 20 seconds, take breaks whenever needed, and switch sides.
Isometrics like this are great because they have natural pain-relieving properties for tendons and joints, making them an ideal warm-up or standalone routine.
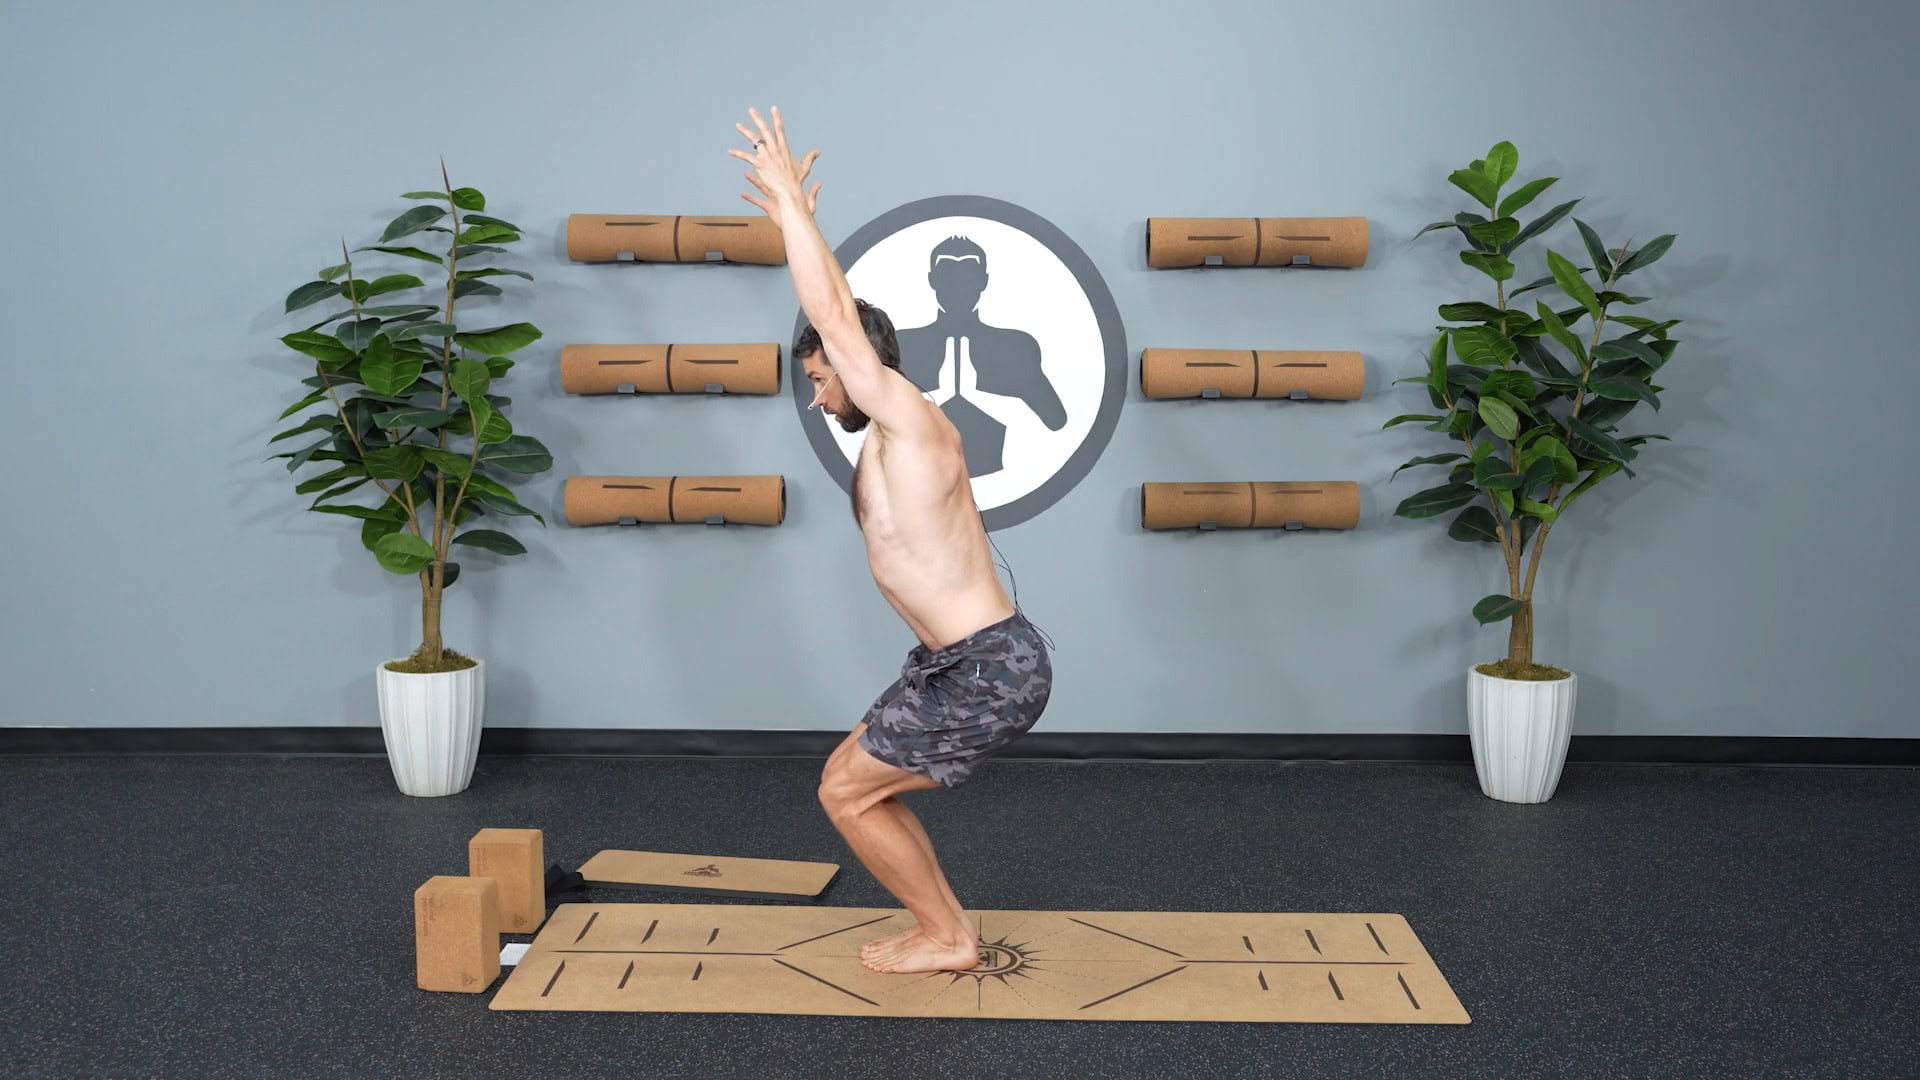
Step 5: Chair Pose
Chair pose is one of the best full lower-body exercises in yoga, working your ankles, knees, hips, and core simultaneously.
- Stand with feet close together, heels slightly apart.
- Bend your knees slightly, then send your hips down and back like you are sitting into a chair.
- Keep your knees back over your mid-foot so the workload stays in your hips and thighs rather than jamming into your kneecaps.
- Reach your arms forward to counterbalance your hips, or bring your biceps up by your ears to work your upper back and shoulders.
- Only sink as low as you can without pain. Hold for a few breaths, stand up to rest if needed, and re-engage.
Step 6: Shallow Squats
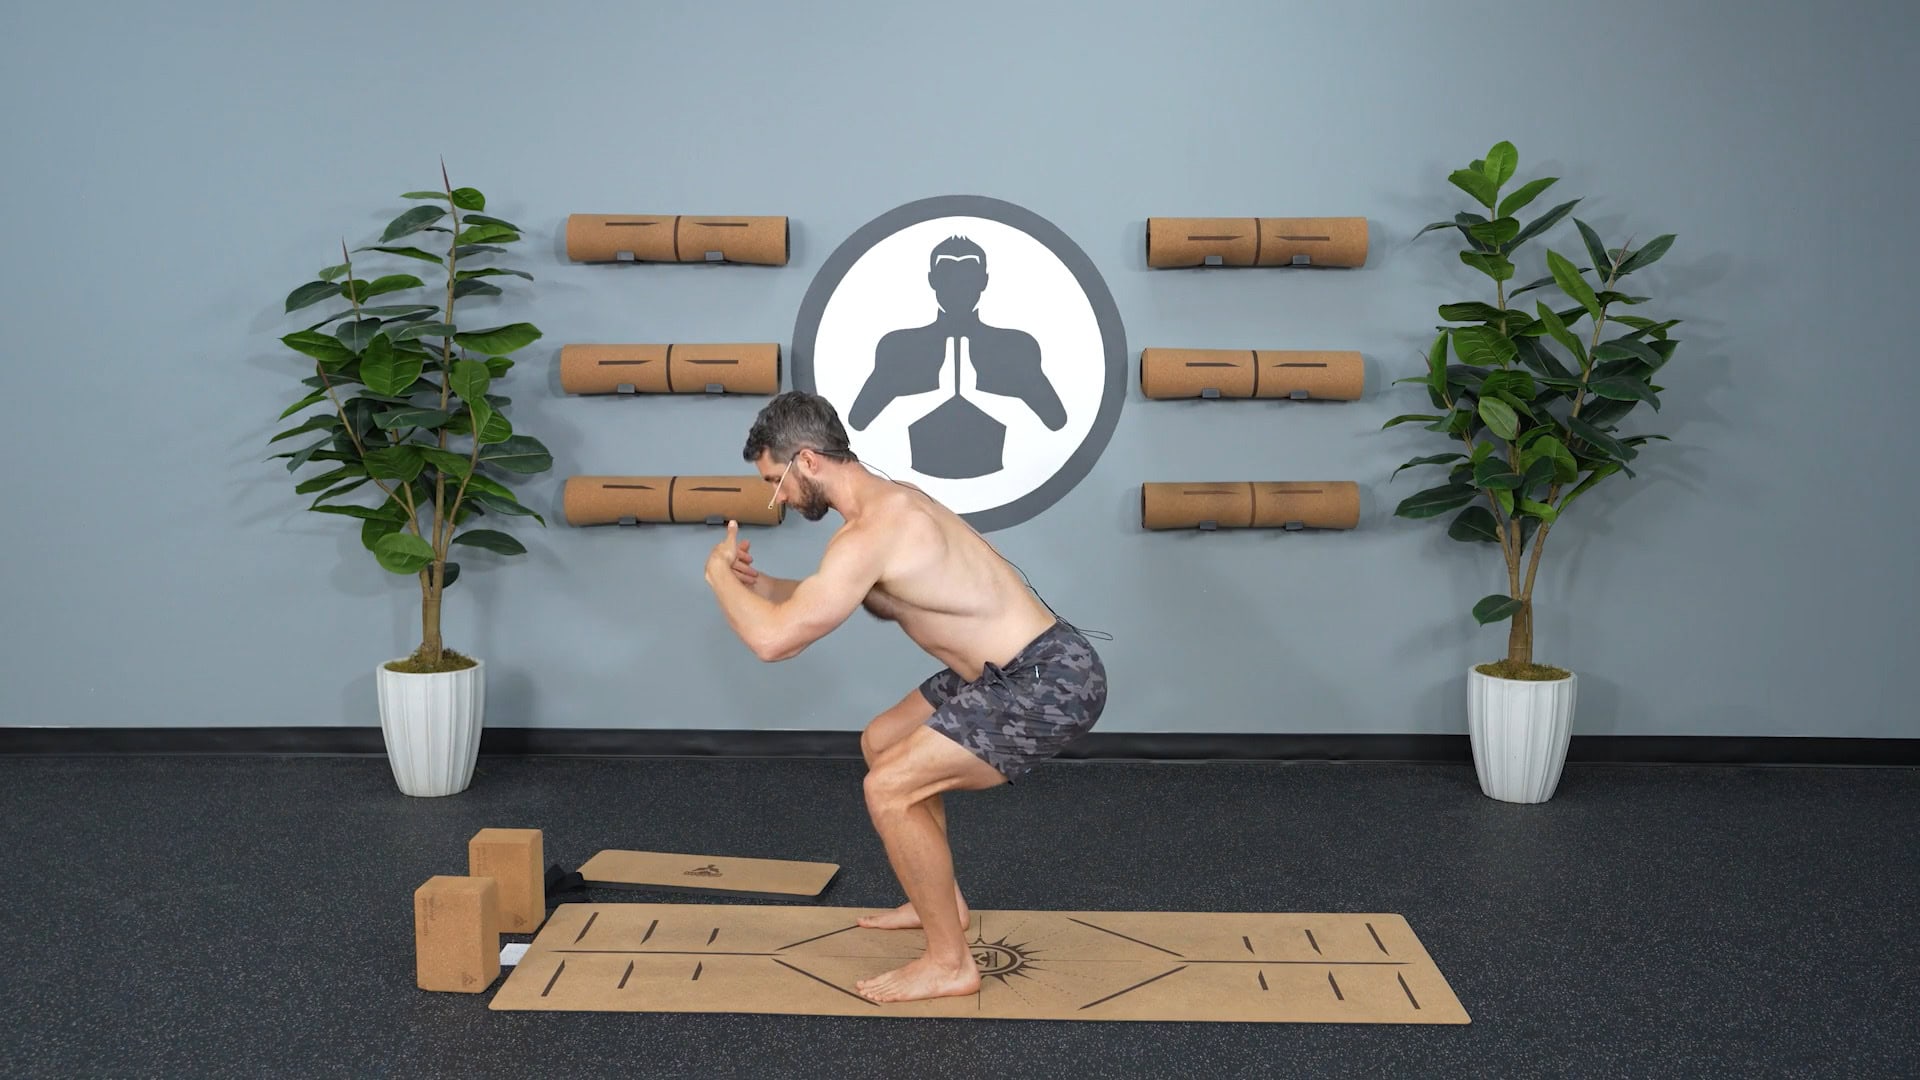
To finish, we move from isometric holds into gentle repetitions to build confidence with standard resistance movements.
- Set your feet shoulder-width apart with your toes turned slightly out.
- Root through the full surface of your feet—don’t let your weight roll onto the outer edges.
- Send your hips down and back, bending the knees just a couple of inches into a shallow squat, then press through the floor to stand back up.
- Depth doesn’t matter here. Focus on moving smoothly and comfortably without joint irritation.
Consistency Over Intensity
Managing sarcopenia requires two key training components: resistance training and balance training. Combine those with proper nutrition—especially getting adequate protein—good sleep, and stress management.
You don’t need to push to a level 10 on day one. Fitness is all about phasing: start with movements you feel comfortable doing, build your confidence, and scale up gradually over time.
Try running through this routine every other day if you’re a beginner, or use it as an activation warm-up before you lift weights. Keep showing up, be patient with your progress, and listen to your body.
More Workouts
Stiff Shoulders? Here is a Quick 10-Minute Routine That Actually Works
A Yoga Routine Built for Total Beginners (No Flexibility Required)
7 Best Yoga Poses to Fix Posture, Mobility, and Core Strength for Men 40+
Breathwork & Movement To Find Peace: Morning Yoga For Anxiety
Your Anxiety Doesn’t Define You – 20-Minute Power Yoga
20-Minute Yoga Routine for Anxiety (To Calm Panic & Get Out of Your Head)
15-Minute Balance Routine for Men in Their 60s

The Ultimate 15-Minute Stretching Routine for Men in Their 60s

Men in your 60s! Have you been waiting for a yoga series created specifically for you?
About Dean Pohlman, Founder & CEO of Man Flow Yoga, Author of Yoga Fitness for Men, Expert on Yoga Fitness for Men.
Dean Pohlman is making yoga more accessible to fitness-minded men. A former collegiate lacrosse player, Dean discovered yoga while recovering from injuries and quickly realized its potential to boost strength, mobility, and overall performance.
Since launching Man Flow Yoga in 2013, Dean Pohlman has built a global community that speaks for itself:
- 195,000+ customers
- 42+ million YouTube views
- 200,000+ followers across Instagram, Facebook, and TikTok
Dean’s book Yoga Fitness for Men has sold over 50,000 copies, while his Body by Yoga DVD series has surpassed 120,000 units sold, earning him consistent #1 rankings on Amazon and thousands of five-star reviews. He’s also been featured in Men’s Health, Muscle & Fitness, GQ Magazine, Fox Tampa Bay, The Chicago Sun, and on influential podcasts like The Ready State and Ben Greenfield Fitness.
With a focus on real results, community, and technique-focused instruction, Dean Pohlman continues to change the conversation around yoga. He’s not just teaching poses—he’s helping people build stronger, more capable bodies for life.